What good is a photograph if it’s not shared? And what good is a mobile app that doesn’t allow you to share it? The answer is: no good. Lightroom Mobile allows you to take a picture, edit it to your heart’s desire, and then share it to Instagram without ever leaving the app—or your mobile phone. It’s super easy, and you can customize a surprising number of details throughout the process.
In this tutorial, you’ll learn the quick and easy steps it takes to share a photo on Instagram using Lightroom Mobile. Check out the options Lightroom Mobile provides, and read the steps that follow. You’ll learn how to select, edit, and share a photograph to Instagram, caption and all.
How to Post to Instagram From Lightroom Mobile
The Basics
Lightroom Mobile is a free app that lets you create, edit, and share high-quality images. Embedded Adobe Photoshop technology provides you with tons of editing tools, over 30 presets, and a ton more—all for free. Upgrading to a Creative Cloud Photography plan gives you access to a few more editing options, as well as syncing across devices, a customizable website, Photoshop, and cloud storage.
Creative Cloud plans and pricing for individuals vary from $9.99/month to $74.49/month (or you can pay annually in one lump sum) and usually come packaged with other perks, apps, and GBs of cloud storage. (Businesses, students & teachers, and schools & universities are offered other plans and pricing.) You can also try it out by activating a free seven-day trial.
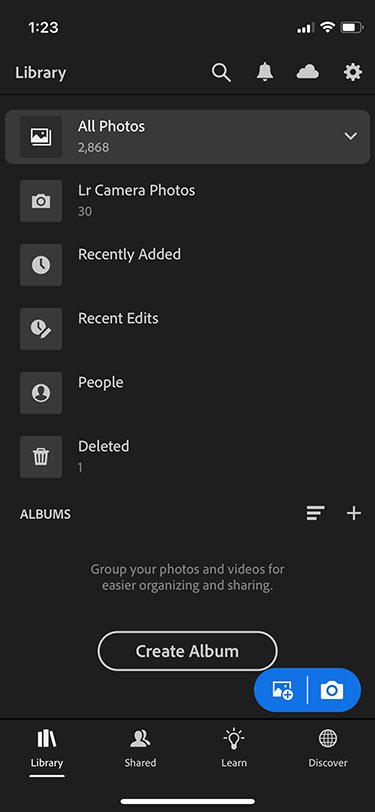
1. Open the Adobe Lightroom Mobile App and Select an Image to Share
Lightroom Mobile automatically opens to your library of images. To find the photograph you want to edit, tap on the relevant option to locate it.


Then tap the image.


2. Edit the Image If Desired
The inherent beauty and serenity of this landscape deserve to be shared, so I selected it. To edit the image, choose from the options at the bottom. There are quite a few, so be sure to scroll through them all to see what’s available. I wanted to crop the image, so I tapped Crop.


I wanted to make the image square, so I tapped 4 x 3 at the bottom to change the crop dimensions.


Then I tapped 1 x 1 to make the crop dimensions square.


Tap the checkmark at the bottom to save your crop.


I also wanted to lighten the shadows, so I tapped Light and increased the value of Shadows.


Finally, I wanted to bring the viewer’s attention to that amazing pool nestled into the coast, so I tapped Effects and decreased the value of Vignette to darken the outer edges of the image.


3. Tap the Share Icon
Once the image is edited and ready to be shared, tap on the Share icon at the top.


4. Select the Export Settings
Tap on the toggle switch to the right of Share to…


Click on the dropdown menus within Export Settings and select the File Type, Dimension, Image Quality, and more options for the file you want to share.


Once you have modified your file, tap the checkmark at the top.


5. Tap Share to…
The app then returns to the previous window. To share this file to Instagram, tap Share to….


6. Tap the Instagram Icon
Options for sharing appear in the middle of the window. Tap the Instagram icon.


7. Choose How to Share the Image to Instagram
There are a few ways you can share an image to Instagram: as a post, a story, or a message to one or more Instagram friends. I tapped Post.


8. Give the Image a Caption
Tap on Write a caption…


Then type in your caption text. I entered the location where the image was made. Reread your caption for typos and clarity.


9. Post to Instagram
Tap Share at the top to share the image to Instagram.


10. Receive Notification of Sharing
And voila! Instagram sends you a notification that the image has been successfully shared—all without ever leaving Lightroom Mobile.


Share Images Worth Sharing
When you make an image that’s got something special going on, share it! It does no good to let it sit on your phone or external drive, never to see the light of day. Just remember to share images responsibly and respectfully. Social media is a public space, so not all images are appropriate to share there.
Keep Learning About Lightroom and Photography
Here are a few more free tutorials and resources to help you study Lightroom and smartphone photography:


 10 Top Instagram Look Presets and Color LUTs for Lightroom CC and Mobile


- How to Use Presets and Filters in Lightroom Mobile
- How to Use Manual Camera Settings to Take Photos With Lightroom Mobile (Pro Mode)
- How to Shoot Raw Photos on Your Phone Using Lightroom Mobile’s DNG Camera
- 10 Top Night and Low Light Photography LUTs and Lightroom Presets


