Jump into After Effects and learn how to create beautiful cinematic effects on any footage. Learn about depth, texture, and motivation, and discover how to create new lighting or enhance the existing lighting.
Which aspect of cinematic lighting do you want to learn? Jump straight to the section that interests you the most:
What You’ll Learn
- How to create depth and texture with lighting
- Motivated vs. non-motivated light
- Creating texture using After Effects animation presets
- Relighting a scene in After Effects
- Creating volumetric lighting in After Effects
About Your Instructor
Tom Graham
I’m a multi-skilled content creator with a background in commercial filmmaking. I’ve worked as a Director, DoP, Producer, Editor, and Creative Director across television commercials, feature films, and large-scale corporate video events. I bring this experience to Tuts+ by creating post-production and filmmaking content for the Envato Tuts+ YouTube Channel.


1. Introduction to Cinematic Lighting
In this first part of the course, I’ll explain what the course covers and what you can expect to learn. I’ll give a quick overview of all the chapters in the course and the key skills you’ll pick up.
If you want to follow along, click the link below to download all the source files and other assets used in the course.
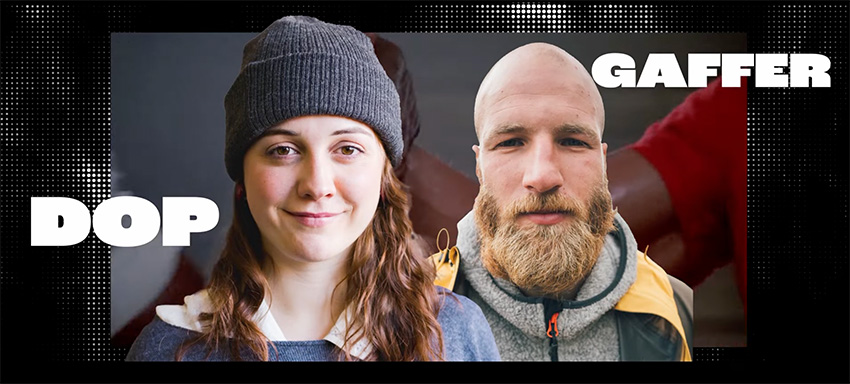
1.1 What Do the Gaffer and Cinematographer Do on Set?
When you’re working in post-production, you’ll need to know the different roles of the film crew on set, so that when you need to make changes, you understand who to talk to.
The gaffer is the head of the lighting department and works directly with the cinematographer, also known as the director of photography (DOP).


In this lesson, I go through exactly what these two people do on set, as well as covering a range of other important roles and explaining the hierarchy within each department.
2. What Makes an Image Cinematic?
In this course, we’ll look at the three fundamentals of cinematic lighting:
- Depth
- Texture
- Motivation
This first lesson is all about depth.
“Depth is about creating the illusion of a three-dimensional space in the 2D image presented to us.”
A great way of creating depth in cinematography is by using a shallow depth of field. That’s when the foreground and background elements are blurred out, leaving the subject sharply in focus. Use the thumbnails below the image to compare how it looks with and without a shallow depth of field.


Watch the video to learn how to create depth of field in cinematography. Then in the next lesson, we’ll see how you can create depth in After Effects.
2.1 How to Create Depth in After Effects
Watch video lesson (14 mins) ↗
In this lesson, we’ll look at how to create depth in After Effects. I’ll take you through all the settings, step by step, using some sample footage:


I’ll show you how to add depth by bringing the woman into full focus and blurring out the man and some of the background elements. We’ll do this by creating some masks, adding a Gaussian Blur to the foreground and background, and cropping the image to remove some of the superfluous items. We’ll also add a color grade and do some basic color correction.
This video shows you in detail how to use the Pen Tool to create masks and apply effects to specific areas of the image.


You’ll also learn a lot about working with the Color settings in After Effects:


The result will be footage that really makes the woman the center of attention. Here it is with all the effects applied:


2.2 How to Create a “Dirty Foreground”
Now let’s look at another technique for creating depth in After Effects: the “dirty foreground”.
Here’s the footage we’ll work with this time. It’s a nice shot of a woman throwing an apple in the air, but there’s a lot of empty space by the window on the left.


We can make it look more interesting by downloading some 3D elements from Envato Elements and positioning them in the frame.
Explore 3D Assets on Envato Elements
In this case, we’ll add a potted plant and a coffee machine:


And then we’ll position them in a realistic way and apply a Gaussian Blur and other effects to create a dirty foreground.


But wait! When the camera tracks across the scene, won’t the plant and coffee machine stay in place? We can fix that by adding Motion Tracking. Simply go to your layer and right-click > Track & Stabilize > Track Motion. I’ll show you how to do motion tracking in After Effects in this video, so that everything looks very realistic.
3. What Does Texture Mean When Talking About Light?
In this chapter, we’ll look at the second of our three elements of cinematic lighting: texture. I’ll start by explaining what texture is.
“Texture is maybe not something you associate with light, but there is certainly a way to create texture with light—in fact, it’s often about the absence of light, i.e. shadows.”
In movies, cinematographers often use dappled light or interesting shadows to create texture on an otherwise blank wall. Here are some examples:


3.1 How to Create Texture Using After Effects Animation Presets
Watch video lesson (10 mins) ↗
So how can you create texture in After Effects if there’s none in the existing footage? That’s what this lesson is all about. We’ll start with some footage that has quite beautiful light coming in through the window, but a fairly blank wall behind.


We’ll give it a more cinematic look by using a preset to add a dappled effect to the wall.
It’s actually quite simple to do this. Just right-click and choose New > Solid to create a solid black shape over the top of the footage. Then go to the Effects & Presets panel and choose Animation Presets > Backgrounds > Cinders.


This will give us a slightly strange-looking effect:


But don’t worry—I’ll show you how to modify this step by step so that we end up with a beautiful, textured result:


4. Motivated vs. Non-Motivated Light
This chapter is all about the third main element of cinematic lighting: motivation.
“A motivated light source is one that has a logical place within the world of the subject or object being captured.”
For example, the light could be coming from a window, a lamp, an illuminated screen, or interior room lighting. These light sources don’t necessarily need to be shown in the shot, but the viewer should believe that the light is coming from a practical lamp, i.e. a light source that’s a real part of the scene. Here are some examples:


Unmotivated light, on the other hand, is lighting that is purely there for illumination, and there’s no practical reason for the light to be falling the way it is.


4.1 Relighting a Scene in After Effects
Watch video lesson (22 mins) ↗
Now let’s look at how to relight a scene in After Effects.


How to Relight a Scene
Analyze the Existing Footage
Understand the motivated and unmotivated light sources, and decide how to improve them.
Add New Lights
You can add new lights by right-clicking and going to New > Light.
Work With the Light Settings
You can choose between Parallel, Spot, Point, and Ambient lights, and you can tweak a lot more settings too. We’ll look at all of that in this video.
Create Masks
Use the Pen Tool to create masks to apply lighting effects to particular areas of the scene.
That’s just a quick overview—there are loads of sophisticated tools you can use in After Effects to control the exact type and direction of the lighting.


We’ll go through them all in this video, so follow along to learn everything you need to know!
4.2 How to Create Shadows With Solids and Masks
Now let’s see how to create shadows to make a scene more dramatic and give it a cinematic look. In this example, we’re taking some footage with a plain white background and adding shadows to give more of a sense of directional light and add some visual interest.


We’ll do this by adding Solids and using some Masks in After Effects, along with some Feathering, Opacity, and Motion Tracking.


5. Clean Plates! How to Light Your Scenes on a Budget
In this section of the course, we’ll talk about clean plates.


You can also capture multiple clean plates at different exposure settings so that you can combine them later in After Effects.


“It’s worth taking the extra time and effort to capture a clean plate of your shot in order to use this to your advantage in post-production.”
5.1 Compositing Multiple Shots Using Clean Plates
Watch video lesson (15 mins) ↗
In this lesson, we’ll see how to use those different plates we shot in the previous lesson and bring them all together into one coherent piece.
We’ll do this by bringing the three pieces of footage in as Layers and then creating Masks to remove unwanted elements like the light stand, using the Subtract option to make them disappear and show the layer underneath.


Then we’ll use the Roto Brush Tool to select the actor in the shot (that’s me, in case you were wondering!).


Then we can use a Mask around the window to adjust the exposure there and create our final result, with the light stands removed and the window properly exposed:


6. What Is Volumetric Lighting?
Now that we’ve mastered key lighting concepts like depth, texture, and motivation, let’s look at one last powerful technique. It’s called volumetric lighting.
“Volumetric lighting is the rays of light that we might see coming through a window, often referred to in cinematography as ‘god rays’ or ‘light beams’.”


6.1 Creating Volumetric Lighting in After Effects
Watch video lesson (13 mins) ↗
OK, for the final part of this cinematic lighting tutorial, let’s look at creating volumetric lighting in After Effects.


How to Create Volumetric Lighting
Use a Light Ray Preset
Go to the Effects & Presets panel and choose CC Light Rays.
Adjust the Brightness and Contrast
Bring the brightness down and the contrast up to accentuate the light rays.
Add a Lens Flare
Go to the Effects & Presets panel and choose Lens Flare.
Add a Solid
Just right-click and choose New > Solid to create a solid shape that you can use as a light beam.
Adjust the Settings
You’ll need to make a lot of adjustments to the settings to make the scene look realistic. I’ll walk you through that in the video.
7. The End: Thanks So Much for Watching!
We’ve made it to the end of the course. In this final short video, I’ll wrap things up and talk about what you can learn next.
Learn More About Adobe After Effects
We have plenty more videos to help you learn more about After Effects. So if you enjoyed this one, be sure to check out these next:
We also have hundreds of free After Effects tutorials here on Envato Tuts+. Here’s a selection to get you started:


 How to Animate Strokes and Glow Effects in After Effects


- Essential After Effects Keyboard Shortcuts: Quick Guide


- How to Use Basic Motion Tracking, Camera Tracking, and Text in After Effects
- How to Use Advanced Motion Tracking in After Effects
- How to Make a Double-Exposure Effect Video in After Effects
- How to Use Dynamic Link to Share Projects Between Premiere Pro and After Effects


