Lighting is a fundamental part to a scene as it helps create an atmosphere, a visual mood and a sense of story or meaning for the audience. It can also help improve the visual quality of the scene and is one of the key elements of good cinematography.
In this tutorial, you will learn the basics of how to enhance your scene using cinematic lighting in Adobe After Effects. This tutorial is related to my free course, How to Animate an Urban Rain Painting in After Effects.
What You’ll Learn in This Tutorial
Adobe After Effects has many different tools that allow you to create a variety of lighting and shadow effects to your scene. In this tutorial we’ll show you the different ways that cinematic lighting can enhance your project. You’ll learn:
- Why lighting is important
- How to use different cinematic lighting styles to use to communicate different moods and atmosphere
- How the use of color can also create different moods to a scene
What You’ll Need
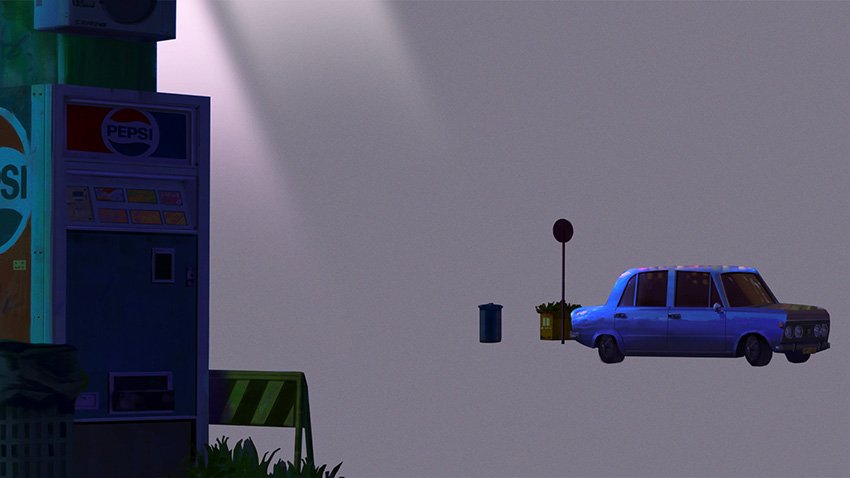
For this tutorial I will use this rainy urban night scene to showcase how cinematic lighting can effect a composition. Ideally, your own scene should also be split into layers like this to allow for greater flexibility.


1. Why is Cinematic Lighting Important?
When creating a visual scene, it is fun and important to think about lighting, whether that is a drawing, photograph, illustration, painting, film or animation. In the image below you can see how the lighting creates drama and a moody atmosphere. This helps with setting a scene and gives food for the viewers imagination of the story.
The lighting can also help tell an audience where to look. Using this particular lighting setup, the light helps guide the eye to a particular area, focal point or prop included in the scene.


When creating your image pay attention to all the different sources of light (such as the neon lights, lanterns and street lamps) and then find out ways in which you can use them to communicate the information that you want.


2. Three-Point Lighting Set Up
To create a new light in After Effects go to Layer > New > Light.
For the purposes of this tutorial we will be using the following settings:
- Light Type: Point
- Color:
FFFFFF - Intensity: 100%


A Three Point Lighting set up is the most standard form of lighting used in most animation and films. This comprises of the following:
Key Light
A Key Light is the primary source of light and is typically positioned off to the side of the camera in front of your subject. It is usually the brightest light source depending on what mood you wish to convey and will be doing most of the heavy lifting when lighting your subject.


Fill Light
The Fill Light illuminates the shadows that the Key Light creates on a subject, which helps reveal some of the details that would otherwise be filled in darkness. The Fill Light is less bright than the Key Light and is usually placed on the opposite side of the camera.


Back Light
The Back Light (also known as the ‘Rim Light’ or ‘Hair Light’, depending on it’s position) is placed behind the subject, which helps push the subject away from the background giving the image a greater sense of depth. This light can also create a rim of light around a hairline, shoulder, or outline, which also helps with this effect.


To create this basic setup in After Effects, select the 2 Views option for the preview panel on the bottom left. Or go to View > Switch View Layout > 2 Views.


Then select the Top View for one of the preview windows and a default Camera View for the other.


Now using the Selection Tool (V) place your lights around the subject to create your Three Point Lighting set up.


Experiment with the different lighting settings such as the intensity, color and light type to help create the type of mood or atmosphere you want for your scene.


3. How Lighting Creates Mood and Atmosphere
Perhaps the most crucial role of lighting is it’s ability to communicate mood and atmosphere to the audience.
Bright and colorful lighting can help convey a positive emotions and a cheerful mood.


In contrast, the dark and shadowy light of the original image can help convey a feeling of mystery, something ominous and foreboding.


4. How Color and Lighting Effects a Scene
In general, there are two main types of color light techniques. These are Cold Lighting and Warm Lighting.
Warm Lighting
Warm lighting is the use of a warm color scheme which often take on the tones of red, orange and yellow. This is often associated in a feeling of comfort, joy, extravagance and romance. Like sitting near campfire or dinner with the family.


Cold Lighting
On the other hand, cold lighting uses color tones such as blue, green, violet or grey. This can be associated with feelings of loneliness, sadness, mystery, or peacefulness.


Awesome! You’re Finished!
Congratulations! And that’s how you can create cinematic lighting using Adobe After Effects! Now that you are familiar with the Three Point Lighting set up and how to create different moods, make sure to experiment with the different lights. Use the settings such as angle, light type, intensity and color to create the look that you want for the scene. In the meantime, I hope you’ve found this tutorial useful, and if you’d like to keep learning about colour in animation, try my recent tutorial about how to create a colour script for animation projects. I’ll see you next time, on Envato Tuts+!


 AnimationHow to Add Soft Lighting to Cartoon Animation in After Effects
- AnimationHow to Add Soft Shadow Effects to Cartoon Animation Using After Effects
- Animation3 Ways to Colour Grade Cartoon Animation Using After Effects
- Photoshop ActionsHow to Create a Light Leak Photoshop Color Effect
- VideoHow to Make Look-Up Tables in After Effects and Premiere Pro (DIY Color Preset LUTs)
- Photography10 Top Bokeh Effects to Add Beautiful Blur to Photos in Photoshop