Yeti is not just a tool for adding and combing hair and fur. Let’s dig into more advanced topics involving the Yeti graph editor.
Welcome to Part 2 of the series where we’ll be exploring some functionalities of the graph editor in-depth. In Part 1, I guided you through the fundamentals of Yeti for Maya. You learned how to set up some nice fur on a character.
However, we have a few uncovered topics that I’d like to show you in this article. Let’s get back to where we left off.
We had the character with some scraggly hair applied. Let’s take our current graph editor.

As you can notice, I added a Scraggle node between the Comb and the Width nodes. Here again, the power of a non-destructive workflow, the rest of the network remains untouched as we add new functionalities.
Furthermore, the Node Inspector for the Scraggle node is extremely intuitive and easy to configure.

We simply have sliders to control the effect over the tip/root of the fiber, a controller for the frequency, a randomness value, a multiplier for the whole effect, and so on.
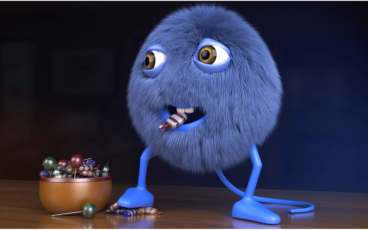
Overall, the Scraggle node messes up the character’s hair a bit, so that he’s funny to look at!

What else can we do? Well, several things to our hairdo!!
Here Come the Clumps
When dealing with fur, the clumping is one of the necessary steps to learn. Everybody knows, from common experience, that hair sometimes shows clusters of fibers of different size.
At the moment, our character has some scraggly hair and, in our previous episode, we explained how to comb straight hair.
Before getting into clumping, I’d like to underline the fact that we can organize our fibers into groups just with the use of the graph editor. There’s no reason to use the Grooming Tools unless you want to adjust your strands or add new attributes.
Let’s modify our previous network in order to create some clumps.


The idea behind the clumping is quite easy. Don’t get intimidated if you’ve just noticed lots of nodes. I’ll try to explain the basic concepts, before getting into the details.
Initially, we take our straight fur without having the Scraggle node applied.
Afterwards, we want to have three levels of clumps for our fur:
- Small Clumps will group hair based on some points scattered on the character’s skin.
- Medium Clumps that take the previous output to generate new groups.
- Big Clumps that finally consider the medium groups to develop other bigger ones.
Bear in mind that the last group is also used to mess up the hair a bit, with the intention of adding some randomness to the final result.

Let’s split our graph into several parts to describe the process in more depth.
We’ve already examined the fur in the first episode. We’ll now concentrate on the strands/fibers and the clumping parts.

The Strands/Fibers as Magnets for Our Fur
The role of the three subnetworks, framed in yellow, is totally different from the fur part. Despite having almost the same nodes, they behave as guides for our future hair.
Note: The term guides here refers to an element supporting the creation of clumps. That must not be confused with a Guide node, which totally implements other functions.
Each subnetwork is made of three nodes, apart from the upper one which has a Scraggle node at the end. They are the Scatter, Grow, and Comb nodes, and they’re all copies of the nodes coming from the fur part (framed in green).
What makes a subnetwork different from one another are the parameters . . . essentially in the Scatter nodes. Let’s see them in depth!
First Subnetwork


Our “magnets” for the hair. 

The Inspector for the Scatter node.


The “Many_Dots” Scatter node has a Density Multiplier of 95, which indicates many points scattered on the character.
An extremely important option to check is the Lock Density, which makes sure a specific density is retained, even if we change the render density as we saw in the previous episode.
We can also play with the Distribution tab and increase the Relax Steps to 2. This makes the point distribution more uniform.
The Grow and Comb nodes haven’t changed, they just make our fibers grow in the right direction.
Practically, these fibers will act like magnets on our visible hair.
Second Subnetwork
The setting is similar but we used different parameters in the “Medium_Dots” Scatter node—the Density Multiplier is now 35 and that creates fewer dots than before. The Lock Density is checked and the Distribution is set to 4.
Furthermore, we don’t have any Scraggle nodes applied.


Fewer “magnets” than before. The Inspector for the Scatter node.


Third Subnetwork
Here, we have few dots and the output will be connected to the last input of our final network. We could keep introducing more subnetworks, but I think that three is perfect for creating the result we want.
In this case, the “Few_Dots” Scatter node has 7 as Density Multiplier (very low), the Lock Density is checked, and the Distribution is 1.
Few “magnets.” The Inspector for the Scatter node.


The Clumping
Once we have our “magnets” ready, we create a subnetwork to manage the clumping.
These nodes take our fibers (the fur) and create some groups, based on the second input, which is the “magnet.”
I assigned test colors to the clumps, just to see the result better in the viewport, but we won’t discuss this step here. Take into account that you can assign colors to clumps if you want to see them better while working.
Small Clumps


Overall view of the small clumps. Node Inspector for the Clumping node.


The Node Inspector for the Clumping node is intuitive. I’ve just underlined three options which mainly determine the look of our clumps.
- Base Attraction controls the strength of the effect towards the base of the fibers.
- Tip Attraction works similarly to the Base Attraction but on the tip of the fibers.
- Attraction Bias says where, along the clump, the transition from base to tip happens.
And many other parameters—like Weight Random or Min/Max Distance—that determine the range of distances for the attraction to work.
Medium Clumps
The medium clumps node takes the previous output and applies a new clumping effect by using the second subnetwork of strands/fibers.
Here’s a comparison of before and after the medium clumps.


If you observe the fibers over the eye and around the mouth, you’ll clearly see how they merge into groups.


Big Clumps
Despite creating bigger clumps, this node is mainly used to mess up the hair and introduce more randomness in the result.
In fact, there’s an option called Fly Away which helps us breakup the clumps a bit and make a more believable effect.


You see that fibers appear longer over the eye, which can be achieved by sculpting the strands with our Grooming Tools, as we saw in the first article. In this case, I used a combination of the Scale, Comb, and Sculpt tools.
I invite you to play with the tools offered by the Grooming Tools. They’re really powerful!
The Power of Expressions
In this last part, we’ll be introducing expressions as a way to have more control over your fur. The documentation page shows the functions you can use in your Yeti graph editor.
In our example, we want to randomize the fiber length based on a custom expression.
We’ll take advantage of the Attribute node to declare an expression for our fibers, then we’ll be using that attribute in the Length Multiplier of the Grow node.
We modify our graph editor by creating an attribute between the Scatter and the Grow nodes.
The attribute holds the following expression:
snoise(P * 50) + pick(P, -5,100)/100
Don’t be scared of that! Just a little math.
The expression uses a noise function which takes the position in the space of each fiber and multiplies it by 50 to increase the global noise frequency.
Furthermore, we have another function called pick, which takes for each fiber, the first value of the vector, to which it applies a hash function.
The result is being mapped to the interval [-5, 100] and everything is divided by 100. Simply put, our fibers will have random length as a result of the sum of the previous functions.
Let’s see how the graph editor appears now:

In the Attribute node, we give a name to the attribute (RandomLength) and put our previous expression in the Default field.
In the Grow node, we simply copy the attribute name (RandomLength) into the Length Multiplier field.


Node Inspector for the Attribute node. Grow node with the linked attribute.


The result is immediately different!

Conclusions
We covered some cool features involving clumping and the power of expressions that create variations in the fiber length with the previous setting.
Furthermore, we demonstrate how easy it is to change the look of our fur without manually sculpting the fibers.
You can play with the interval in the pick function, or with the frequency in the snoise function to tweak the result. From here, you can experiment with other interesting elements like the Convert, Curl, Guide nodes—to name a few.
Always remember that the Yeti graph editor works together with the Grooming Tools in a non-destructive way, making the process clean and well organized.
In Part 3, we’ll be exploring other advanced techniques while creating fur in Yeti.
You can find some of my works at my Artstation page.
Stay tuned!!
Looking for 3D assets? TurboSquid by Shutterstock has over 1 million 3D models used by game developers, news agencies, architects, visual effects studios, advertisers, and creative professionals around the world.
Visit TurboSquid by Shutterstock
The post Part 2: Creating Fur Variations in Yeti appeared first on The Shutterstock Blog.