In this lesson from David Bode’s FREE Ultimate Premiere FAQ course, you’re going to learn how to use the Essential Sound panel to deal with sound effects and ambience.
SFX
To edit your sound effects, start by highlighting them and tagging them with SFX in the Essential Sound panel.
Loudness
Next, work your way through the control options, starting with Auto Match in Loudness. This may work well or not so well, depending on your sound effects. If you have multiple sound effect clips with different sound levels, Auto Match is going to make a very level playing field.
Reverb
Reverb is something that will work a little bit better with high-impact sound effects. The nice thing about Reverb is that it has the effect of pushing things in the background. So you can select something like heavy reverb and maybe just dial it up a little bit more.
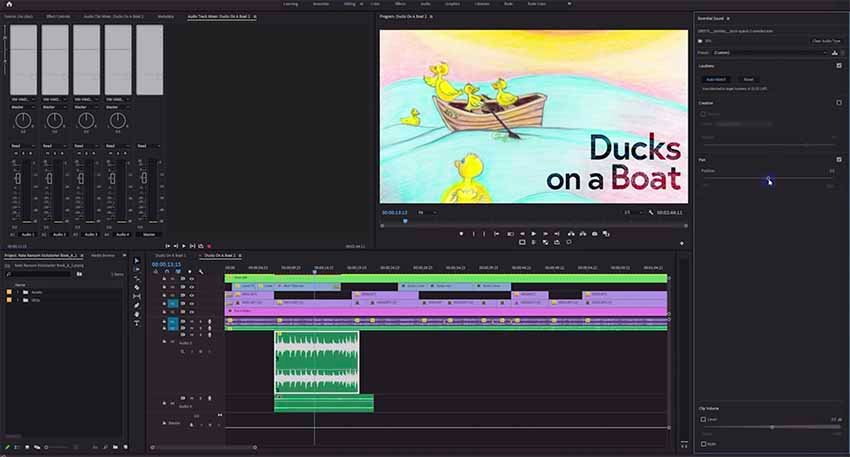
Pan
The Pan option is nice if you have a bunch of sound effect clips and you need to manage their position in terms of their stereo imaging right or left. This is a quick way that you can do that, and you don’t have to go into the effect controls—you can just move the slider right or left.
You’d be surprised at how much clearer you can make a mix by taking some sound effects and moving them around. Also, if you have a lot of things going on, spacing those out in terms of right and left can really open up your mix a lot more. So experiment with that.


Ambience
To edit your ambient sounds, start by highlighting them and tagging them with Ambience in the Essential Sound panel.
Loudness
Next, work your way through the control options, starting with Auto Match in Loudness. This may not work depending on your audio combinations because it brings up the level of the ambient clip considerably.
Creative
We also have Creative, which is reverb. At this point, you may be thinking creative is just a reverb. Not really that creative, right? I would agree, but the nice thing about reverb is when you’re dealing with ambient sounds, it has the effect of pushing the ambient sounds in the background. If something is further away from you, it’s going to sound more reverberant.
The more reverberant a sound is, the less clear it will sound. That’s because you’re hearing direct sound mixed with reflected sound that is delayed. The direct sound gets to your ear first, and then you hear the reflections of that sound bouncing off different surfaces, and they all get to your ear at a later time. That’s what makes reverb, and the effect is that it sounds less clear.
Stereo Width
This is a nice way to give your audio a wider or narrower stereo image. If you pull the slider all the way down to narrow, it actually collapses the stereo recording into a mono track. It’s not really a mono track, but it makes both the right and the left channels the same, which is more or less mono. But if we push it the other way, it gives this really wide kind of sound, which can be really useful.
Ducking
And finally we have Ducking. If your ambient sound effect is way too loud, apply some more aggressive ducking and generate some keyframes, and pull it down so it fits into the mix.
Now maybe apply a little bit of cross-fade or just throw a couple of keyframes on there to fade in and out in a nice, subtle way.
If you’re unfamiliar with how to mix audio, these are some great options to choose. And even if you are familiar, you’d be hard-pressed to do some of these operations in a faster and easier way.
More Premiere Pro Resources
Here are more top Premiere Pro tutorials and resources to try from Envato Tuts+:


