Last month, in “How to Edit and Assess Your Photographs,” Amy Touchette outlined her photo editing process. In this tutorial we take another look at photo editing principles and practices, but from a digital asset management perspective. You’ll learn how to plan your editing, use ratings, and harness the potential of subjectivity to keep your post-production workflow lean, effective, and fun.
Photo Editing is an Essential Photographic Skill
A great deal of digital asset management (DAM) involves how to organize your files, where to save them, and when to back them up. However, a well-designed DAM system also saves you processing time and energy by focusing you on the images worth your efforts. Editing, stage three of our digital asset management workflow, involves reviewing your pictures after the shoot and deciding what, if anything, you will do with them. Editing may be only one of six stages in managing digital assets, but it is also the stage that will give you immediate return on your investment of time.
Editing also involves organizing your images and tagging them with keywords, but in this tutorial we’re focusing solely on ranking—how we decide which images to take forward into processing and printing or publishing. We’re going to look at what images you can safely reject and how to evaluate the calibre of the remaining images. But before we can do that, we need to consider how we see our work and how that influences evaluation of our own images.
Appreciate the Subjective Nature of Photographic Images
Do an Internet search on the topic of subjectivity in photography and you will come up with endless pages, from the simplest observation to the most philosophical. It’s interesting reading, but for our purpose, I’m going to cut through all of that to the basics.
Being subjective means evaluating something based on, or influenced by, our personal feelings, tastes, ideas, values, or opinions. Cameras may be objective visual recorders, but photography is highly subjective. What a camera captures is shaped by the person using the camera. What is produced from the image is shaped by the person doing the processing. What is seen in the final photograph is shaped by the person doing the looking. There is a deep river of experiences, knowledge, and opinion in each of us, shaping our decisions whether we intend it or not.
Reality leaves a lot to the imagination. —John Lennon
When evaluating images in photography, especially when evaluating our own images, subjectivity plays out in layers:
- Our experience and opinions shape what we like and don’t like.
- Our experiences and opinions, and what we like and don’t like shape what we choose to capture with our cameras and how we capture it.
- Our experiences and opinions, what we like and don’t like, and our memory of the event and time we captured the image shapes what we see in the photograph and how we feel about it.
How do we possibly navigate our way out of that to decide which of our images are worth our time and effort? Simply being aware of our subjective nature and how it’s influencing our decisions is a great first step. A few tricks and methodical assessment will help us more.
Keep Your Review Process Loose, But Structured
To gain some objectivity when reviewing your images, try using one or more of these techniques during your review process. All techniques work well when making your first selection of images. Some of the techniques also help with image selection on second and third rounds. Once you’ve worked out a good reviewing process for your workflow, it should feel fun to engage with the images again at each stage.
Take Your Time
To help separate photographs from the experience of being in the moment taking the photographs, try leaving your images for a few days or even a week or more before editing them. Usually, your emotional attachment to an image will fade as the memory of the moment of capture recedes. If you do need or want to edit your images right away, try to find time to return to them a week or month later. You’ll be surprised by how differently you’ll see your collection.
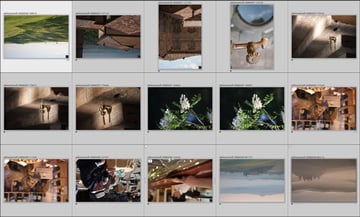
Make a Rapid Review
Another trick involves making your first round of selections very quickly. View your images one by one in as large a format as possible with minimal background clutter. If using Adobe Lightroom, you would use Loupe view (E) with Lights Out (L, L). Position your fingers of your right hand on the forward and back cursor keys and whip through the images, taking only a few seconds to view each image. Go back and forth if you need to, but don’t pause over an image. Keep your left hand positioned to strike whatever key you need to use to rate an image. In Lightroom, this would be 1. If you feel any kind of positive or mixed response to the image, mark it as a selection.
View Things Upside Down
A third method is to rotate the images 180˚ so you are viewing the images upside down. This is a cumbersome process, but it’s an effective way to shake things up when you feel stuck. It works both when editing and when evaluating a single image during processing. Once upside down, an image is reduced to graphic elements in a composition. Distribution of elements becomes easier to see as is use of line, colour, texture, and light. You will also quickly see the focal point of an image, even if it is not your intended centre of interest.
If working in Lightroom, you can rotate a number of images at once from the Grid view (G). Select all of the images you wish to review, then rotate them all with Command- or Control-Bracket ([ or ]). When you’re done with your review, repeat the rotation to place your images upright again.

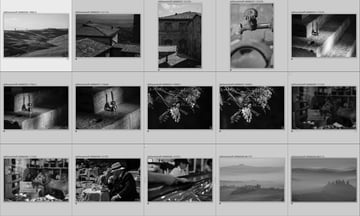
View in Black and White
Yet one more trick for improving your objectivity when editing is to view the images in black and white. This is also a cumbersome process but, like rotating images, it’s effective for gaining some perspective. The risk is that sometimes colour is what makes the photograph. However, if you’re using more than one method (and you should use more than one method), you’ll be in good shape.
If you’re using Lightroom and want to convert a number of images at once to review them in black and white, work again in Grid view (G). Select all of the images you wish to review. Under Quick Develop > Saved Presets, select one of the black and white presets. To convert the images back to their original colour, select the images again in Grid view (G), and under Quick Develop > Saved Presets, select Default Setting. Be patient for all images to convert; depending upon how many images you selected, it might take a minute or two for Lightroom to process them all.

Flag Your Rejects
Before you begin to rate your images, do a first review for rejects. This is a quick and easy stage; you’re only looking for obvious technical failures. These are the misfires, blown exposures, impossibly over- or underexposed images, chopped or turned heads, gaping mouths or other contorted expressions, lack of focus, unexpected obstructions, and so on.
If the image size is large enough when your images are displayed in a grid, you can complete this first review without going through each image one by one. In fact, if the problem doesn’t jump out at you when you’re looking at the images in a grid, the technical failure is probably not significant enough to reject the image.
Mark your technical failures as rejected. (In Lightroom, use the Rejected flag (X).) Whether you delete these images is up to you. I usually delete mine but not until I’m completely finished processing that shoot and then only once I’ve taken a second look at what I marked as rejected. In any case, before moving on with your review, you want to filter your images so that the rejects no longer appear in your collection. (In Lightroom, filter your collection by Attribute and select the icon for unflagged images.)


Break Editing Work Into Manageable Stages
Assessing images in order to select those you wish to process and publish is not the same as evaluating images for a critique. Many of the same principles apply, but the goals and methods are different. An image critique is useful if you’re looking for ways to improve your work or if you’re questioning which of a few selected images you’re going to add to a portfolio or showing. However, that level of analysis will impede, not improve, editing as a part of digital asset management. In DAM, the goal is to quickly and effectively narrow your field of evaluation in order to identify images that are suitable for your client or project.
Purpose
Before starting the rating process, ask yourself what you intended with the photos. It’s easy to say that you want to pick the best images, but what constitutes “best” depends upon your purpose. If you intend to create a record of an event—a wedding, for example—you’ll want photographs with clear subjects that capture unrepeatable moments, tell a story, or express a relationship. If, on the other hand, you intend to select photographs for self-expression, you’ll want photographs that evoke an emotional response or show visual elements in unusual and intriguing ways.
Don’t be too pedantic about identifying the purpose of your images. If you’re evaluating an image for a critique or trying to decide between similar images, you will want to be precise about intent. However, at this stage, a general sense of your intent is enough.
1-star: Structure, Story, and Possibility
Keeping the purpose of your photos in mind, make your first selections by assessing an image’s overall structure and your emotional reaction to the image. Don’t spend a lot of time deliberating over which images to include in this selection. This is a quick, high-level review intended to catch any image that might be worth a second look in the next round of editing. Uncertainty is a good thing here: if you are unsure about an image at this stage, that is a clue that the picture has some unresolved potential.
But why use overall structure and emotion as the assessment standard at this first level? Digital photography has fostered an expectation of technical perfection in our images, but that is not what we notice or respond to first when we look at an image. To see what I mean, have a look at some of Henri Cartier-Bresson’s photographs. Many of them have technical faults—soft focus or lost details in shadows, for example—but we still celebrate and love them because the overall structure works. The story is there.
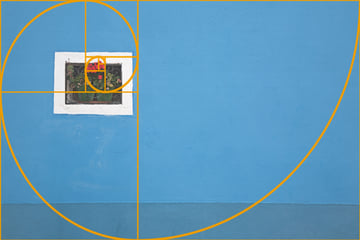
We instinctively respond to powerful organization in an image. We’re taught the Rule of Thirds, the Golden Ratio and Golden Triangle, and the Fibonacci Spiral, but these are not rules that create impact. Rather, the rules articulate how nature is organized and how we innately respond to visual organization. We are taught these rules so we can deliberately compose a photograph to take advantage of our intuitive engagement with these compositions. Watch for these compositional structures to help you select images that will engender viewer engagement. These are images worth your time and energy.


Because we respond innately to overall organization in an image, pay attention to your emotional response on this first review of images. We also emotionally respond to the presence of a story, and good photos tell stories at first glance. As with composition, it’s not the rules of narrative structure that create emotion. Rather, the rules articulate how we naturally recognize stories. We learn and selectively use these narrative structures to compose images that will engage our unconscious response to story.
Trust your intuition on this first review. If you are immediately drawn to an image or the image evokes a querying response from you—the image makes you look twice and question its value—then mark the image as selected. You can evaluate the reason for your emotional engagement later in the review process.
2-stars: Technical Quality
You will have already eliminated images that are obvious technical failures. This second review is to evaluate the technical quality of images you’ve identified as having possibility for structure or story. This stage of review is deliberate in order to force a more objective evaluation of the images. You’ll find yourself comparing images and going back and forth through your selection.
Start by limiting your selection to only those images you chose in the first round of review. (If you’re using Lightroom, filter your collection by Attribute and select the icon for one star.) You need to view your images as large as your monitor will allow. You may also need to zoom in and out of an image. Sometimes, you’ll look at one image at a time; other times, you’ll want to look at two or more images together for comparison and choice.
Take your time to examine focus and image quality, visualize a different crop, and anticipate the end effect of processing. However, don’t get overly fussy about your assessment. You can always remove an image if you decide later that it didn’t hold up to your assessment. Similarly, you may take a closer look at an image in this group and wonder why you ever moved it on through the first selection. If that’s the case, simply remove the rating and let the image fall back into the group of unused images.
When evaluating the technical merits of images, again recall the purpose of your images and look at focus, exposure, and lighting. Also consider the technical basics of composition. This time, you are looking for reasons to exclude an image. If the image fails technically, move on. If the image is technically sound, mark it for your selection with a second star (2 in Lightroom).
Here’s what to look for at this stage:
Focus
- Is the centre of interest in focus?
- Is depth of field adequate to keep everything of what’s important in the image in focus?
- Does depth of field exclude competing background details?
- Is there evidence of camera shake?
- Was the focal length or zoom setting of the lens the right choice for the subject?
Exposure
- Is the exposure balanced and appropriate for the image?
- Are all important aspects of the subject well exposed? If not, is it within an adjustable range?
- Are there unrecoverable blown highlights or blocked shadows in the image?
- Does lens flare or glare interfere with the image?
- Is there unresolvable image noise that interferes with the image or impedes printing the image at the required size?
Lighting
- Does the quality of light align with the intent, overall mode, and tone of the image?
- Is the light too harsh, too contrasty, or is it too soft and flat?
- Is light used to reveal what’s important in the image and de-emphasize less important parts of the image?
- Do the effects created by artificial lighting and reflectors enhance the image?
- Is the colour balanced or corrected for the light temperature? If not, can it be corrected?
Composition
- Is everything necessary included in the photograph?
- Have you chopped off a person’s limbs in a distracting way, and if so, is the problem recoverable with a different crop?
- Do other elements in the image compete with the subject for attention? If so, can the distracting elements be cropped out?
- Are there distracting overlapping elements; for example, a tree growing out of a head?
- Is the image straight? If not, is there room in the image to straighten it?
- Is there a sense of order and balance in the image that helps lead the eye through the composition?


Depending upon the purpose of your photographs, this second round of review may be as far as you need to go with narrowing your selection of images for correction and adjustment before publishing. If, however, you want to be more selective, progress to another level of review. But before you do either, whether output or further editing, take care of another important task: tag the images that have made it through this second round of review with keywords.
3-stars: Artistic Strength
Now that you have images that are constructed well and have technical merit, review the images for artistic strength. This is a more challenging assessment to make, but it gets easier with practice. Practising on someone else’s images and providing that photographer with feedback is a great way to develop strength in reviewing your own images.
Start by limiting your selection to only those images that made it through your second round of review. (If you’re using Lightroom, filter your collection by Attribute and select the icon for two stars.) This time, you may want to look at the images at a size that allows you to see the details while still giving you enough distance for perspective.
Take your time, go back and forth, and compare images. Try to visualize the end result of processing your image. If working in software that allows you to make non-destructive edits, try some quick crops or basic image adjustments if that will help. Still, keep your review brief: spending a lot of time assessing an image is counterproductive when you could simply process the image in the same amount of time.
In this review, you are looking for reasons to include the image in your selection. The following list of considerations is not exhaustive, but it’s a place to start. And not every consideration will apply to all images. Again, it depends upon your intent for the images. Also remember that you are not evaluating the image for a critique; rather, you are assessing the image to determine whether it’s worth processing and publishing.
- What is the first thing you see in the image? Is what you see what you had in mind for the photograph? Is the subject matter purposeful or haphazard? Is the main subject clearly defined and separated from the background?
- Does the image elicit an emotion or make a statement that you can articulate? Can you relate to the subject or the situation? Or does it spark something within you that you can’t express?
- Is there a sense of overall organization in the image? Look for balance and imbalance, and interaction between different shapes, patterns, and light within the scene.
- Are there textures in the image and if so, are they lit to best advantage?
- Does the image dance? Look for visual movement in the image—elements that draw the viewer in and lead the viewer around, but not out of, the image.
- Does the colour palette suit the image? Assess colour distribution, harmony, and saturation.
- Assess tonality and separation, especially if the image is going to be black and white. Does the image have an adequate range of tones?
- Do the quality and direction of light add to the image? Are the main point of interests adequately lit? Does the lighting add mood to the image?
- Is the photo interesting and fresh? Does the photo disclose more about the subject or show it in unexpected ways? Are the visual elements related in unusual and intriguing ways?
4- and 5-stars: Self-Promotion and Celebration
Photographers each have their own system for rating, flagging, and marking images. You may choose to use four and five stars or flags or colour labelling to identify images for different purposes, building a consistent system that suits the way you manage your digital assets. You may never go further than using rejected flags and one or two stars. Use what works for you.
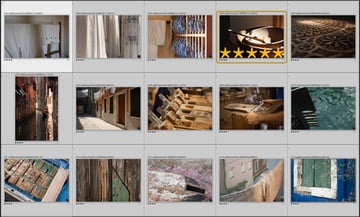
I choose to use four and five stars as a way of further refining my collection of selected images; however, I carry out this review after I’ve processed the images I selected with two or three stars. Before I archive a shoot, I go back through the finished images and mark the images that I think are particularly noteworthy with four stars. These are not just images I like, but are images that I’m proud to show others and that others would identify as high quality. I add these images to my collection for self-promotion, using them on my website, in sample albums, and in promotional materials. I do not find 4-star images in every shoot.
Sometime later, after I’ve let the selection of images for self-promotion sit for a bit, I go through my 4-star collection and tag exceptional images with five stars. The images selected for five stars are images that go beyond predictable. They are unique, show the subject in extraordinary ways, express my vision, and sing with technical and artistic merit. I set these images aside in a collection for my portfolio, salon exhibits, and contest entries. These are the images I’ll organize for a photo book or nurture through a master printing process to frame and hang. Occasionally, I’ll find one 5-star image in a shoot. More often, I’ll not find a 5-star image in several shoots and then will find a few in one shoot. These 5-star images are rare finds, and when found, are worth celebrating.

Practice and Proficiency
Learn how to review your photographs for many reasons. In digital asset management, you review your photographs for efficiency. Don’t spend energy on images that won’t give you return on your efforts. To do otherwise slows you down, undermines your self-confidence, and steals valuable time that you could spend making new and better images.
But don’t stop there. Practice reviewing your images for quality control and self-improvement. You want to ensure that your clients get work that will make them come back for more. You also don’t want to be circulating poor images that will forever be associated with your name. As you review your images for digital asset management and for quality control, use the opportunity to identify how you can improve your photography. Practising review will make you more efficient, more marketable, and a better photographer.
Author’s Note: I reference Lightroom actions in this article but everything I discuss is available as a feature in most image management software. To learn more about managing images in Lightroom and about using other image management software, have a look at any of the following:
- Adobe Lightroom CC for Photographers (course)
- How to Review, Edit, and Sequence Photos in Adobe Photoshop Lightroom
- Shooting Stars: Rating and Filtering Pictures in Lightroom
- Unlocking the Power of Lightroom Color Labels
- Free DAM! 5 No-Cost Programs to Manage Your Digital Image Collection
- How to Choose Asset Management Software for Your Digital Picture Archive
- Apple Photos for Photographers
- Getting Started With Photos for OS X

