
Most of the photo editing programs available today are app-based, meaning that in order to use them, you must first download and install the application onto your computer.
Photopea is unique in this space. Not only is it entirely free to use, it’s also a web-based application, which means you can simply head over to photopea.com and be editing your photo within seconds.
In this tutorial, I’m going to walk you through a basic edit of Cropping, Resizing, and Sharpening your photo using Photopea.
1. Head Over to www.photopea.com and Get Started


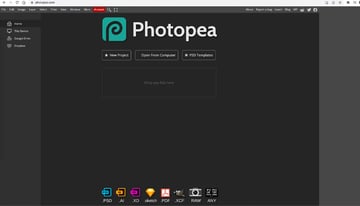
As you can see, Photopea supports a myriad of different file types: everything from Adobe Photoshop files (.PSD) to Adobe Illustrator files (.AI). It even supports RAW photos (.CR2 for Canon or .NEF for Nikon, etc.).
Open your selected photo in Photopea, and let’s jump into the edit.
2. How to Crop Your Photo in Photopea
On the left-hand side of the workspace, you’ll notice a toolbar. This contains the most frequently used tools in a photo editor. The fifth tool down is the Crop tool (C hotkey). It looks like a square with some overhanging lines. Click on the tool, and an outline will appear around your photo.


Now it’s up to you to find the crop that works best for your photo. I want to get rid of the extra information on the left side of the frame, as well as cropping out some of the table underneath the vase.
To do so, simply click and drag any of the boxes that appear at the perimeter of the outline that Photopea overlays when the Crop tool is selected.


Once you’ve found a shape that you’re happy with, click the check mark (✓) at the top of the menu to commit to your Crop.
3. How to Resize Your Photo in Photopea
If you started with a high-resolution photo and you want to post it to social media, resizing is a must so that your file size is manageable online.
In the top menu, there’s a tab labelled Image. Give this a click to reveal the dropdown menu, and then click on Image Size (⌘/Control-Alt/Option-I hotkey). This will open the Image Size tab and display the current size of your photo.


I want to post this photo on Instagram, which allows for a maximum size of 1080 pixels wide. Click the little chain symbol, which will keep your aspect ratio linked, and input 1080 into the Width box. Because you clicked the chain, this will automatically change your height to the correct proportions.


Leave Resample checked, and Interpolation as Bilinear. Then click OK.
4. How to Sharpen Your Photo in Photopea
Now that our photo is cropped and resized, the last step is to Sharpen our photo to make sure it looks its best online. There are a number of ways to sharpen a photo, but I’m going to show you how to use my favourite method, the Unsharp Mask tool.
In the top menu, click the Filter tab, and then in the dropdown menu, hover over Sharpen and select Unsharp Mask. There’s no right answer for how much to sharpen an image, so you’ll have to use your eyes to guide you to the right settings for your photo. Be sure that Preview is selected so you can see the application of the sharpening on your photo in real time.


I landed on a Sharpening Amount of 177%, a Radius of 0.2 px, and a Threshold of 2. Play around with these sliders, and let your eyes guide you. Click OK to commit to your sharpening.
5. Save Your Cropped, Resized, Sharpened Photo
Now that your edit is finished and ready to be shared, the only step remaining is to Save this edit as a JPG.
In the top menu, click the File tab, and then in the dropdown menu, hover over Export As, and then select JPG.

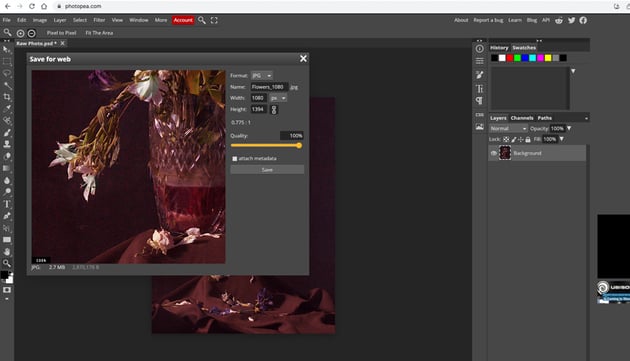

Here you can name your file. In the same menu, be sure to double-check that your image size is correct, and put the Quality at 100%. Click on Save, and your computer will automatically download the edited photo.
Conclusion
That’s it! I hope you’ve found this tutorial helpful. Whether you’re new to photo editing or just looking for a free alternative to Photoshop, Photopea is a shockingly powerful and capable photo editor.


