Here we are going to be doing a natural, basic makeup application on a woman with light skin, and hopefully you’ll learn to be able to recreate it and follow along at home.
1. Exfoliate
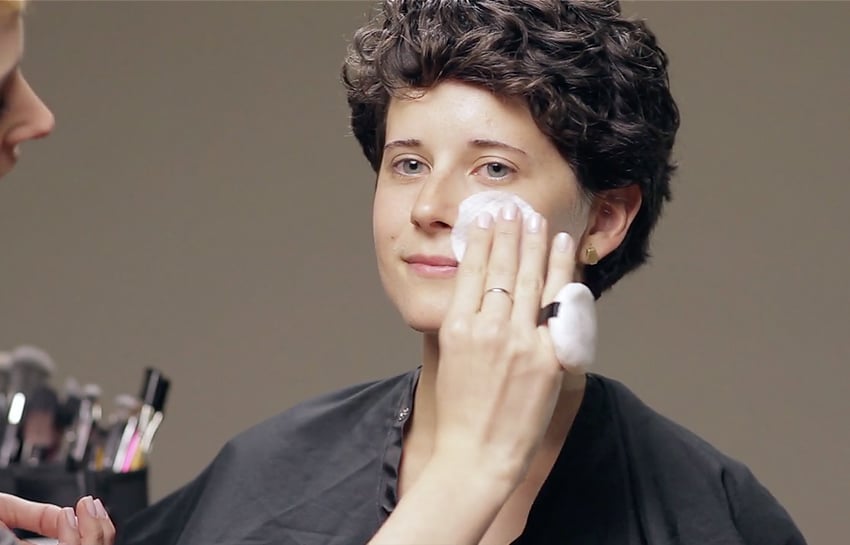
Our model has a normal/dry combination skin. Knowing that, first I’m going to apply a light exfoliator all over their complexion. This will get rid of any of the dead skin that’s sitting on the surface of the skin. If you have any dryness, especially around the nose, this is the step that will take that all away.


2. Moisturize
For the next step, I’m going to apply a basic moisturizer that will hydrate the skin. You can use your fingers or a brush to apply, but I typically like to use a brush as it’s a little bit more hygienic.
The type of brush that I am using to apply the moisturizer is just a basic flat brush. It doesn’t really matter whether it is synthetic or a natural hair, as long as it’s just a flat brush it will deposit the moisture onto the skin.


3. Face Primer
After moisturizing the skin, I’m going to use a face primer. My favourite is a silicone base because it’s going to move really well with the skin. To apply the silicone-based primer, again you can use your fingers or a brush. I’m going to use the same brush that I used to apply the moisturizer.
Start from the inside of the cheek area and lightly blend out towards the perimeter of the complexion.
Because our model has a combination skin, liquid or cream foundations are going to be her best friend. Makeup powders are typically going to dry up around the nose area and they might look a little bit more textured, so when I do finally apply powder, I’m going to be very careful of the nose area.
4. Foundation
In the meantime, you can apply the foundation to the back of your hand. Pick it up with a beauty blender, and just lightly brush and pat it onto the complexion. Allowing the beauty blender to be damp is going to create a smoother texture and a softer finish. It’s not going to apply the foundation very heavily, and it will allow you to build up the coverage in thin layers so that the foundation looks really natural and very skinlike.


Turn the beauty blender around for any harder-to-reach areas. The foundation that I’m using is Graftobian foundation. It comes in a kit with a whole assortment of skin tones, so it’s very easy to match skin tones at any time of the year.
5. Under the Eyes
For the under-eye area, what’s typically best is to use something that corrects and conceals all-in-one. We’re going to use a purple-toned colour corrector to brighten underneath the eyes.
Brushes can be multifunctional, and for this I’m actually going to use a cream eyeshadow brush. I like this one specifically because it’s a synthetic brush. It’s not going to apply a heavy amount of product, and it kind of buffs the product right into the skin because of its dome shape. This is a very soft application.


A really important step when it comes to colour correcting underneath the eye is blending. To do this properly, I just keep pushing the product thinner and thinner underneath the eye, and I keep blending it further down into the cheek and up the cheekbone. This way, the under-eye area doesn’t look too heavy, dry, or full of fine lines from the product seeping into any creases. This technique makes it look nice and smooth.
For the under-eye area, I would suggest using a translucent powder to set your concealer. This will allow you to avoid any creasing throughout the day, and it gives a nice, bright, and smooth appearance to the under-eye.
Take your ring finger, and using the warmth of your skin, press out what might be any fine lines from the product setting in. Use a stippling motion, not a pulling and dragging motion. Then, using a soft, fluffy, longhaired brush that’s small enough for the under-eye area, apply the translucent powder.
Essentially, we’ll do this to the whole complexion once we’re done, but to do it to the under-eye area right after you apply your corrector or concealer is going to allow for a smoother, longer wear.
6. Complexion
Now, we are going to add a bit of highlight, contour, and dimension to the complexion. When you are contouring or adding dimension to the complexion, you want there to be a shadow, not necessarily just a dark smudge in the hollow of the cheekbone.


I’m using a domed brush, and it fits nicely into the little crevices of her complexion. It is a natural-haired brush, so it is going to pick up the product a bit more heavily, and especially because she is on camera, I want to apply a bit more than I would if she was just going out.
7. Bronzer
Now, to take away a little bit of that shadow colouring or any greyness, I’m going to apply a light bronzer just to warm up her complexion and give her a healthy look. I’m also going to add a bit of bronzer to the higher planes of the face, which will allow for a really natural look. It doesn’t hurt to blend a little bit further down the neck as well, so that you don’t have a floating head effect or a mask-like look.
8. Blend
At this stage, I’m going to use my beauty blender without any additional product to do some light blending. I’m going to just lightly blend the powder and melt it into the liquid or cream foundation that I originally used. This is going to allow for a really natural skin finish.


I’m going to take any excess product that the beauty blender picked up, and rub right onto the ear. This will allow for the face to look fully the same colour, so if you’re moving your head around, you’ll appear as one tone all the way around.
9. Blush
Next, I’m going to use a cream blush because she has a drier skin type around the centre of her face. Using a cream rather than a powder is going to give the skin a more hydrated look.
For the cream blush, I am using a foundation airbrush. You can use this for cream products, whether that be any contour products or just a blush. For powder blushes, I’d suggest using something a bit fluffier and not so dense.


10. Eye Primer
For the eyes, I’m going to start off with an eye primer, which is going to be like a glue. That will allow for the shadow to stay on throughout the shoot, or even all day. This product is completely clear. They do come in some skintone shades if you wanted to even out the skintone on the eyelid, but we’re going to be applying a shadow, so clear is best.
11. Brows
While the eye primer dries, I’m just going to apply a brow pencil to the brows. She already has nice brows here, but I just want to fill them in a bit, making them a little more pronounced for video. When working with a pencil, you want to use light strokes. You don’t want just go in and draw in full lines of brow.


The brow pencil that I’m using specifically is from the line Anastasia. I absolutely love these brow pencils! The colours are really natural, and they match natural hair colours well. They also buff out into almost a powdered finish, so it really doesn’t look as if you’re wearing any brow product.
12. Eyeshadow
For the eyeshadow, I’m going to be using a natural-haired all-over eyeshadow brush. You can really just use a light or a dark shade—you don’t have to have a full palette of colours.
First, I’m going to apply a lighter shadow all over the eye, and this is going to dilute the stickiness of the eye primer so that when you put on your darker shadow, it doesn’t go on too dark or muddy. Sometimes, it’s a bit harder to blend darker shadows if you put them directly onto the eye primer.


I always tap the excess of the product onto my hand so that it doesn’t fall into the under-eye area that we’ve already done. Using the same brush, I’m working right into the crease of her eye. Even when she’s looking straight ahead, it’s going to allow for a little bit more depth, and putting the lighter colour on the lid is going to bring the centre of the eye forward.


Our model has a beautiful eye colour and a really great eye shape. If you or somebody that you’re working on has larger eyes and you wanted to make them appear a little bit smaller, you could use liner on both the top and the bottom water lines.
I’m just going to use a delicate eyeshadow here, just to give her a bit of a line underneath the eye. Sometimes liner on the bottom can be slightly heavy, so using some shadow can do the trick instead.


You can go all the way underneath the eye, or you can go halfway—it depends on the eye shape.
13. Eye Liner
Next, I’m going to be applying some liner onto the lash line. I am very lightly, in short strokes, applying a brown pencil that I’ll smudge out for a really natural look. In order to smudge the look and make it a little bit more smoky and soft, I’m just using an angled eyeliner brush and pretty much blending out and removing what I place down.


For a longer shoot, I would suggest using a waterproof liner. That way, there’s no need to worry that it could move on you.
14. Mascara
Now I’ll apply mascara to define, lengthen, and add volume to her lashes. The goal of mascara is to enhance the lashes, so we don’t need to go through with layers and create a false lash look. If you want, you can, but for natural makeup, just a light application is fine.
Also, typically keeping mascara on the top lashes is going to create a natural look more than adding it to the bottom. Adding mascara to the bottom is going to make the eyes appear a bit bigger, and it might be more of a dramatic look.
15. Lip Liner
Finishing up here, I chose a natural coloured lip liner. This one is from the line Makeup Forever which are waterproof, so you can talk as much as you want and they won’t move.
For a natural lip, following exactly where your lip line ends is going to be the best place to guide you. If you have any unevenness or your lips aren’t symmetrical, this is where you could go through and correct that. I’m just colouring in the lip a bit with the pencil, which allows for an even longer wear.


A semi-matte lip balm is going to bring moisture to the lip. You could just apply the chapstick right with the applicator—you don’t have to use a brush—but a brush is better used for an actual lip. If you want a nice precise application, then definitely I would go for a lip brush.
16. Mattifying Powder
Last but not least, I’ll use a mattifying powder to seal the product in. If the primer is your first piece of bread, this is the second piece of bread, sandwiching in all the other layers that we already applied.
For this application, I’d highly suggest using a fluffier, synthetic brush. Because her nose is a little bit on the drier side, I’m going very lightly around the nose. I don’t want the powder to cake too much onto the drier areas of the skin.


And there is your basic natural makeup look!
Before / After


Conclusion
Now that you’ve seen product applied and you’ve learned several techniques, you’re ready to move on. In the next tutorial, we’ll kick it up a notch and create a more advanced beauty look with our model. You’ll learn some more advanced techniques for creating drama in the eyes, chiseling out the cheekbones, and creating big, beautiful-looking lips.

