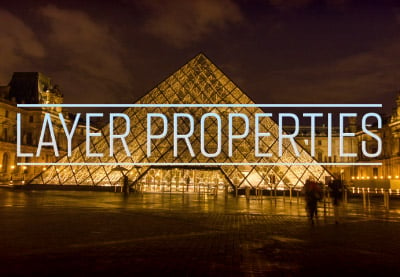


In this After Effects animation lighting tutorial, you’ll learn how to animate strokes and glow effects in Adobe After Effects. Taking an example project, we’re going to punch up the text with some awesome text effects and give it a really cool electronic look.


What You’ll Need to Animate Glow in After Effects
The following assets were used during the production of this After Effects animation lighting tutorial:


In this project, the text is an imported Adobe Illustrator file contained within a pre-comp. If you want more animation options, we’ll need access to the actual text as a text layer.
We can do this by using the Type Tool and choosing the same font as what is displayed here. Or we can simply copy and paste the text directly from Adobe Illustrator into the project. By doing so, any formatting that might have been done within Illustrator transfers over to After Effects.


Now, what I’d like to do is convert this text into shape layers. You can do this by right-clicking on the layer and choosing Create > Create Shapes From Text, which will create a new shapes layer and automatically hide the original text layer.


Open up the layer options. What I want to do is give it a stroke effect and animate the strokes around the text in an interesting way.
To do this, let’s expand all of the layers. And if you hit the Tilde key on the keyboard, this will give you a better look at all your layers.


Grab all the fills and strokes and delete them.


Click on the Add button and choose Stroke.


And that’s going to put a stroke down at the bottom of this stack. That way, I can control one stroke for the entire layer, and all the shapes will have this stroke, which makes it easier to animate.


Hit the Tilde key again to return to the normal view, and adjust the stroke size by changing the Stroke Width value.


I’m also going to have the stroke match the color of the text. Just select the shapes layer, and then click on the stroke button at the top. Then use the Eyedropper Tool to match the color of the text layer below (you will need to unhide the layer to do this).


Click on the Add button and choose Trim Paths.


And that will put the trim paths at the bottom of all of these groups, which means that the trim paths will essentially affect everything that’s above them.


Now, to animate the strokes, go back to the beginning of the timeline and drop a keyframe for both End and Offset.


Then go forwards about three seconds. I’ll put the end at 100%, and I’ll put the offset to 1. This will do one full revolution or rotation of the offset.


Click on the play preview button to preview the stroke animation, which reveals a kind of wrapping line effect.


Now you may notice that the animation for the ‘O’ is doing some strange things. That’s because the ‘O’ shape is made up of two groups, each with a path and a merge path applied. The merge path is there to subtract the middle shape from the outer shape so that it has a ‘hole’ when filled (otherwise it will just look like an oval).


However, we don’t need that as we are dealing with strokes. So let’s remove the Merge Path and do the same for the letter ‘R’ and the other ‘O’. Once you’ve done that, the animation should play properly.


Select the keyframes and apply Easy Ease with the F9 key on the keyboard.


You can also change the Butt Caps to Round Caps if you prefer that look. And you can change the Join Style to Round to smooth out the corners of the letters.


I would like the fill layer to come in at 3 seconds, so let’s move it accordingly.


Then, on my stroke layer, I’m going to animate the stroke width, so add a keyframe for that at 3 seconds.


Move forward to about 5 seconds and change the stroke width to 0. You can also easy ease the keyframe for a better animation.


From there, hit the Play Preview button to see the timing of the animation and make any adjustments to it accordingly. For this example, I’m going to speed the animation up a little bit by moving the keyframes closer together.


Now that we have the text animation, let’s go back to the original composition so we can start adding some other effects like glows.
Select the Text comp and add a Glow effect to it using the Effects and Presets console or by going to Effect > Stylize > Glow.


Increase the Glow Radius and the Glow Threshold until you get a look that you like.


You can also duplicate the effect to stack it, which can improve the effect further.


Going back into the Text Comp, you can also turn on Motion Blur for the stroke, which will improve the look of the animation.


From here, we can fake some more intense glowing by duplicating the outline layer. Go to where the stroke is being animated in the timeline, and change the stroke width to something smaller whilst changing the color to white.


Then add a Gaussian Blur effect to create an inner glow effect.


Press the play preview button to see what your animation looks like.


Congratulations


Congratulations! And that’s how you can animate strokes and glows in Adobe After Effects. Once you’re done, experiment with settings such as the intensity to create an effect that you are happy with. Now that you’ve learned how to animate glow in After Effects, check out some of the other After Effects tutorials we have below.
I hope you’ve found this After Effects animation lighting tutorial useful, and I’ll see you next time on Envato Tuts+!


