Audio editing with Fairlight, in DaVinci Resolve, is designed to be user-friendly, with an intuitive interface that allows you to see what’s going on with your project. However, you will need a few things to make audio editing functional and more fun. In this tutorial you’ll learn how to find an affordable audio interface, pick headphones and monitors, and get some basics tips for setting up your workspace.
Getting Started With Audio in Fairlight
Processing voice recordings is a pretty common need, so that’s a good place to start. Here’s a tour of the Fairlight interface from our free course on audio editing for speech and dialogue in Fairlight. More tips and recommendations after the jump!
Starting With the Basics
DaVinci Resolve/Fairlight is an amazing option for those starting out. You gain access to a professional NLE without having to spend a ton of cash. It’s actually free for the most part, and you likely won’t need the premium paid options for a while. Those savings could easily be used to build your collection hardware tools.
If you’re just getting into audio editing, you might feel tempted to get more gear and spend more than you really need to. If you’re coming to Fairlight from another audio editing or recording suite, good news: you likely already have everything. The ethos is to buy what you need, not what you think you need, and grow from there.
Shopping for audio gear can be overwhelming, and it’s easy to trick yourself into thinking you need the latest and greatest stuff to produce outstanding results. Don’t despair! While that logic isn’t completely wrong, it isn’t the full story, either. In the long run, it’s more important that you enjoying learning, approach the tools with comfort, and take with pleasure in the process. Your attitude has more impact on the outcome than the tools, and this is true for working with Fairlight; it’s easier to have a relaxed attitude when you haven’t spent a lot of money on tech just to get started.
Buy Used, Get Creative
Thankfully for us there are wonderful options available that won’t break the bank, including a huge used market for audio equipment. None of the equipment recommended here is really all that new or complex, and audio gear in general is basically a mature technology, so your uncle’s vintage kit might work just as well as new stuff. There are tons of cool DIY designs and kits if you are technically minded, too. Look locally, and buy used if you can.
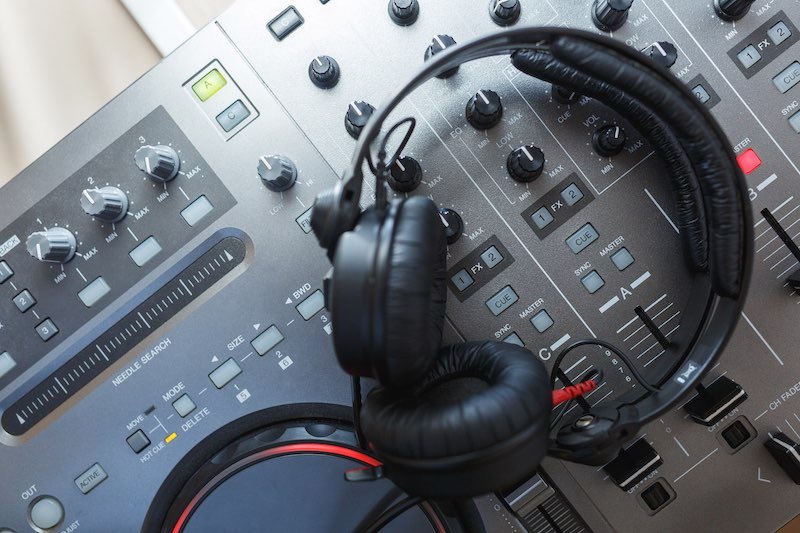
Recording and Mixing Audio With Headphones
Gear can be pretty personal and headphones are no different, but if I I could pick just one piece of kit to assist me, hands down I would pick quality headphones.
Each set has it’s own list of pros and cons. Generally I like something comfy that doesn’t colour the sound too much. “Colour” is a term used to describe a sound that is shaped to be more pleasant in one way or another. A “flat” or neutral representation of your sound helps you find problematic areas in your mix. That being said, if you have a pair of sweet listening headphones and know how where they enhance the sound, mixing and editing is doable.
Ultimately, you’ll probably want two pairs of headphones: a closed-back pair for recording, especially if you go on location, plus an open-back pair for indoor, relaxed, attuned listening and working on your recordings.
Recommended Headphones for Recording Audio
To record audio, we’re looking for a comfortable set of closed-back, over-ear headphones that cup the entire ear and block outside noise. Here are some suggestions.
The Sony MDR-7506 Closed-Back Professional Headphones are an industry-standard, budget-friendly option—they’re suitable for location mixing and commonly found in a lot of local studios. They’re comfy and have an impressive sound. While they could be more durable, if they live indoors they should last a while [Editor’s note: had a pair that lasted for 10 years]. You can find them selling from $100-140 US. And if you can’t, or if you prefer, Senal makes a very, very similar alternative, which sports a few extra features for around the same price. The audio quality is very close, too, if not practically the same.
There are lots of less expensive options out there, and smaller brands can offer some surprising deals. If you are looking for a higher-calibre headphone, the large brands like Shure, AKG, and Sennheiser have options too. Any pair of studio headphones from these companies would do happily do the trick, and there is no wrong answer when it comes to your listening and comfort preferences.


Recommended Headphones for Mixing Your Recordings
Open-back or semi-open back headphones are what we’re after for mixing purposes. Instead of cupping the ears into miniature cones of silence, isolating all outside noise, these headphones are more like a set of suspended speakers that sit outside each ear. This allows the air and noise pressure to move more freely through each speaker, reducing fatigue.
A three of the instructors here at Envato Tuts+ recommend the Beyerdynamic DT880 Pro, another semi-open back headphone with great sound and wearabilty, though I haven’t used them myself.
As for me, I’ve really enjoyed using the Open Back AKG K 701 for mixing. They have a great frequency range, they are light on ears, and the low-end isn’t exaggerated, which is something I look for in a set of work headphones.
Another solid option, especially if you’ll be staying indoors, is the semi open-backed Samson SR850 Professional Studio Reference Headphones. This is a great pair of budget-friendly headphones. They have a fairly flat sound making them ideal for mixing and yet they provide a little something extra to make everyday listening enjoyable. The semi-open-back design makes critical listening more comfortable. They can be found online around the $70 range.


Monitors (Speakers)
Before you go and buy a pair of speakers ask a question: do I have a sound treated room? The usual answer is no. If not, are you willing to treat the room?
If you live in apartment like me, speakers are kind of an interesting dilemma. Like many people, I prefer mixing to monitors rather than headphones, but it’s not nearly ideal considering noise, housemates, and neighbours. Because of this I don’t really use expensive speakers. Rather, I use inexpensive speakers I know and like, and depend more on a good set of headphones for critical listening—as we covered above.
Monitor Recommendations
So, what do I recommend for monitors, considering that? A modest pair of powered monitors like the M-Audio BX3. These monitors are by no means the top ones out there, but I’ve happily mixed using them. Monitors, like headphones, are funny like that. Each pair requires you to get used to how they express sound. What I really like about these is that they are $150 for a pair, making them a bargain.
If you aren’t looking to save on cost, or you have the space for some great monitors that give you a nice flat sound, the Yamaha HS8 is what I would put my money into. These are about $1100 for a pair and for the quality and price it’s hard to find a better monitor anywhere. Treat them right and they should last a lifetime.
Don’t forget the gear you already have, too: It’s also worth listening to your audio through the speakers on your computer, just to hear how things sound on common equipment and less-capable speakers. Lots of people will hear what you make on laptop speakers, for better or worse.
Audio Interfaces
At their most basic, an audio interface gives you a way to get sounds in and out of your computer. They can help move audio between programs, too.
Looking into audio interfaces feels like opening pandora’s box of options. When I bought my first one, at first I was very sure I needed a powerful 8-channel interface with all the bells and whistles to accommodate every audio possibility. Thankfully, I ended up getting a great 2-channel option, which I eventually downgraded to an even cheaper option. Not because it was better, just because it was was all I needed for the type of work I was doing. Here are my recommendations:
The PreSonus AudioBox 96 2×2 USB 2.0 Recording System is what I am currently using, and it checks all the boxes for basic audio work Two independent powered channels, inputs for headphones and monitors, and is built well enough that after a few drops it is still functioning perfectly. While it doesn’t have amazing microphone pre-amps, I haven’t yet found that to be a let down, and there are tons of great stand-alone mic pre-amps out there if needed. You can find this used for under $60 or new for around $140. I have used this professionally to do additional dialog recording and have had no problems getting great results.


Another option is the Focusrite line of interfaces, which we’ve used here at Envato Tuts+ for many years now. The Scarlett Solo and Scarlett Duo USB interfaces are pretty similar to the PreSonus. Like PreSonus, Focusrite makes a few different lines of interfaces with varying inputs, qualities, capabilities and prices.
This next recommendation is a piece of gear you might already have: a portable audio recorder. Most digital recorders in the ZOOM line, for example, can be used as live audio interfaces, including the ZOOM H1N pocket recorder and F4 (discontinued), F6, F8N, and other field recorders. Tascam and Sound Devices also make great audio recorders that can double as interfaces.
This next option is a little pricey but it’s worth the look if you will regularly use your computer to record audio and have around $1200 to spend on an interface: Universal Audio’s Apollo Twin MkII. This piece of hardware is pretty serious and offers you all the features you would need in the future. That being said, if this is your first interface the likelihood of needing this is low. It’s sweet though.
Overall, to start I would recommend a simple no frills PreSonus Audiobox or similar. The cost, ease of use, sturdy and functional design makes this interface great for setting up a simple home studio for editing audio for video with Fairlight.
Audio and Sound Effects
Audio really brings video to life, and Fairlight has a great selection of foley sounds available for free with its more recent updates. Foley sounds are used to give depth to visuals. Footsteps, creaky floors, and jangled keys are examples of foley sound.
This feature can be found by navigating to the Fairlight page within Resolve and is located on the top bar. While these sounds are great, the search feature isn’t the best. You can either search “name,” “description,” or “all,” which means both name and description. There is no master list that you can easily access within the software, which isn’t the end of the world, but it would be nice to have a view all.
Another outstanding resource for audio that includes foley and music is Envato Elements. Elements has a giant library of top-notch effects and music for a reasonable membership price. Unlimited access also includes video, photography, motion graphics templates, and more to enhance your projects.
Last Words, Next Steps
Thanks for learning about some of the tools that make editing Audio a breeze. If you would like to learn more about DaVinci and creating amazing videos, make sure to check out these tutorials:


 AudioHow to Use a Limiter to Boost Voice Recording Levels in DaVinci Resolve
- VideoHow to Process Voice Recordings in DaVinci Resolve Using Fairlight (Free)
- VideoA Quick Guide to the Layout in DaVinci Resolve 18, for Beginners
- AudioHow to Use Expanders and Gates to Reduce Audio Background Noise in DaVinci Resolve